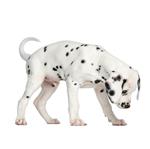
A weekly ear check should be part of basic pet care for your dog and cat. Cleaning the ears is not always necessary however, its good practice to inspect the ears regularly to ensure that common ear problems such as mites and infections, can be detected at an early stage. Moreover, these regular checks will ensue your pets get used to having their ears checked, helping them to be more amenable should they require any treatment.
Common Ear Problems in Your Pet
The most common ear problems you are likely to come across in your dogs and cats are:
- Yeast infections (more dogs than cats)
- Bacterial or fungal infections
- Ear mites (more cats than dogs)
- Allergies
- Foreign bodies
- Tumours
Steps to Cleaning Your Dog or Cat’s Ears
Step 1 – Preparation
Prepare everything you need: ear cleaner (from your vet), cotton wool/pads and lukewarm water.
Step 2 – Restraining Your Pet
Restraining your dog or cat properly will reduce the risk to hurt him or her. Sometimes, especially the first times, it might be handy to have another person with you to help hold your pet. A cat can even be wrapped in a towel for restraining and a dog is often easily restraint between one person’s legs. It may also help to have their hindquarters backed against a wall or in a corner to help keep them still.
Step 3 – View Your Pet’s Ear
Hold the tip of the ear between your thumb and forefinger. Then, you can slightly pull the ear up and back (or even fold back the ear) so that you can see the inner part of the ear.
Step 4 – How to Spot Ear Problems in Your Pet
Look for signs of problems: redness, scabs, discharge, excessive dirt/cerumen (dark brown), blood, etc. If you spot any of these symptoms, please book an appointment with your vet as soon as possible.
Step 5 – Cleaning Your Pet's Ear
If the ear needs cleaning, moisten cotton wool in lukewarm water and gently wipe the ear. If there is more dirt further inside the ear, administer ear cleaner into the ear. For doing that, it is usually easier if you pull the ear slightly up and away from your pet’s head. Once the cleaner is administered, you should gently massage the base of the ear.
Gently wipe the inside of the ear with cotton wool to remove excess ear cleaner/left cerumen.
Step 7 – Post Pet Ear Cleaning
It’s completely normal for your dog or cat to shake their head following the ear cleaning procedure. However, if they continue to shake their head excessively hours or even days after, please go to your vet to get it examined as there may be more severe problems behind it.
Pet Ear Cleaning Warning!
Please DO NOT use cotton buds to clean the inside of the ear as it will push and dirt/grime further down into the ear, causing additional problems.
Always ask your vet for advice and make sure you use the right cleaner/product and technique to clean your pet’s ears. Incorrect using of ear cleaning products or late treatment can result in permanent damage of your dog or cat’s hearing!
© Dr. med. vet. C. Mederle


